Stargate Iris
The iris is a metal covering on the Earth Stargate which is used to screen incoming traffic.
When the iris is closed, it forms a barrier less than three μm from the wormhole’s event horizon, thereby preventing most forms of matter from properly reintegrating.
Source: stargate.fandom.com
Stargate is a gateway to other worlds, hiding many things to discover but also many dangers.
Surely, you don’t want any uninvited visitors; there is a very democratic way of preventing such occurrences – build a wall and let every visitor smash into it, and by the wall, I mean the iris.
Iris types
Naquadah Alloy iris
naquadah_alloy_iris
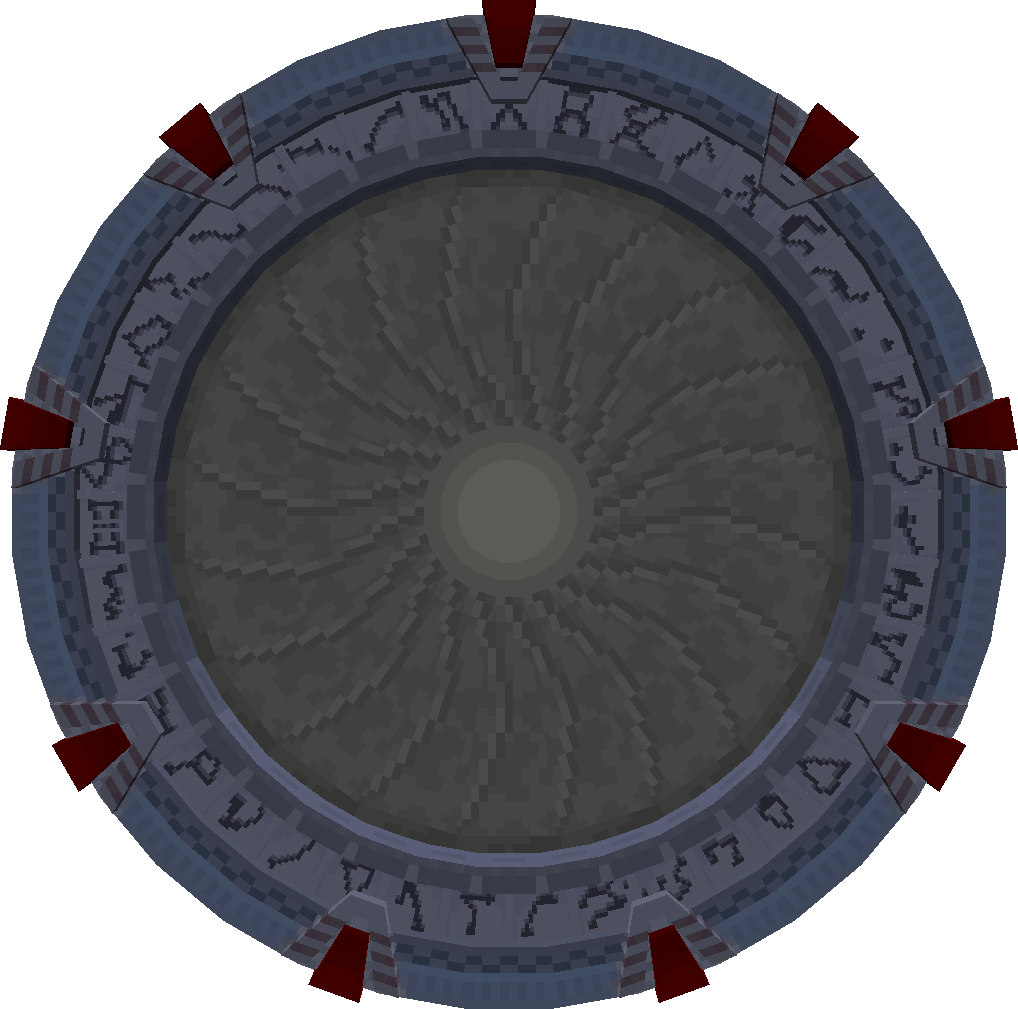
Steel iris
steel_iris
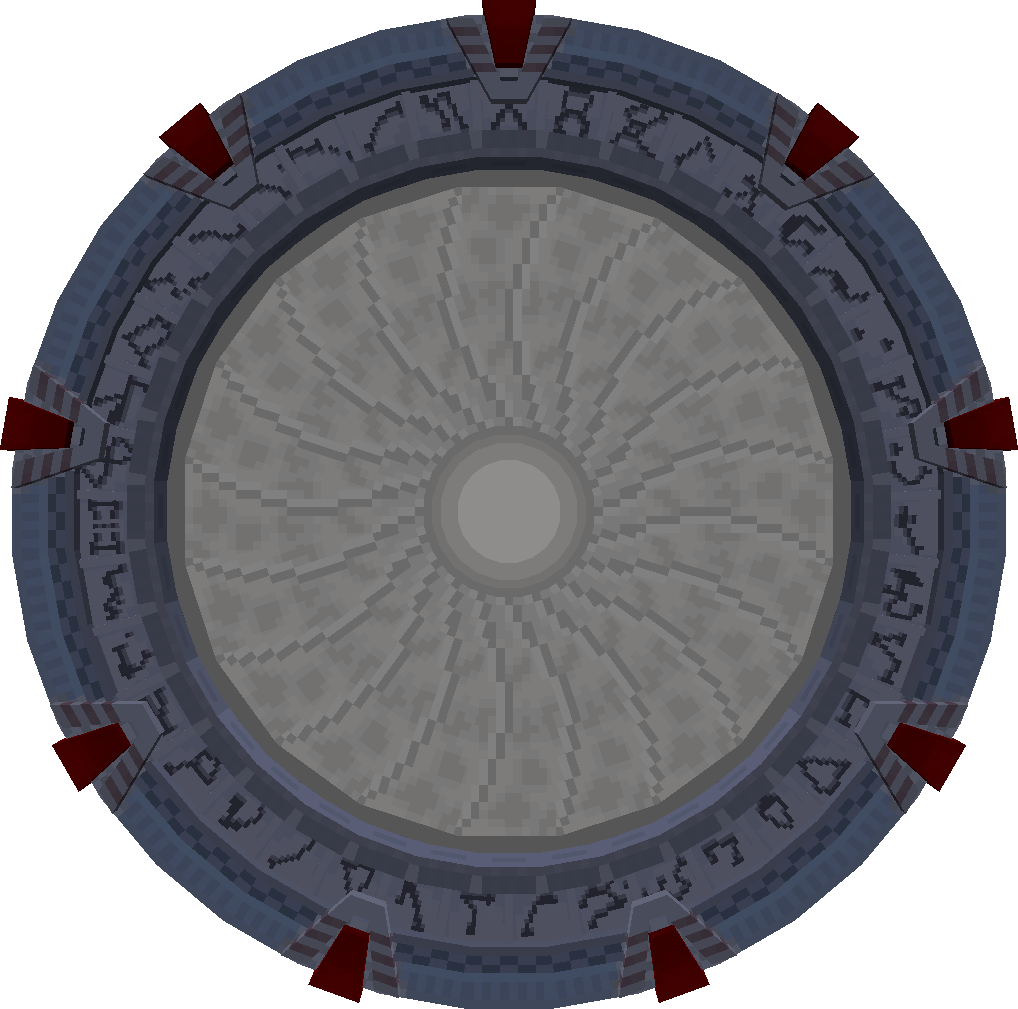
Copper iris
copper_iris
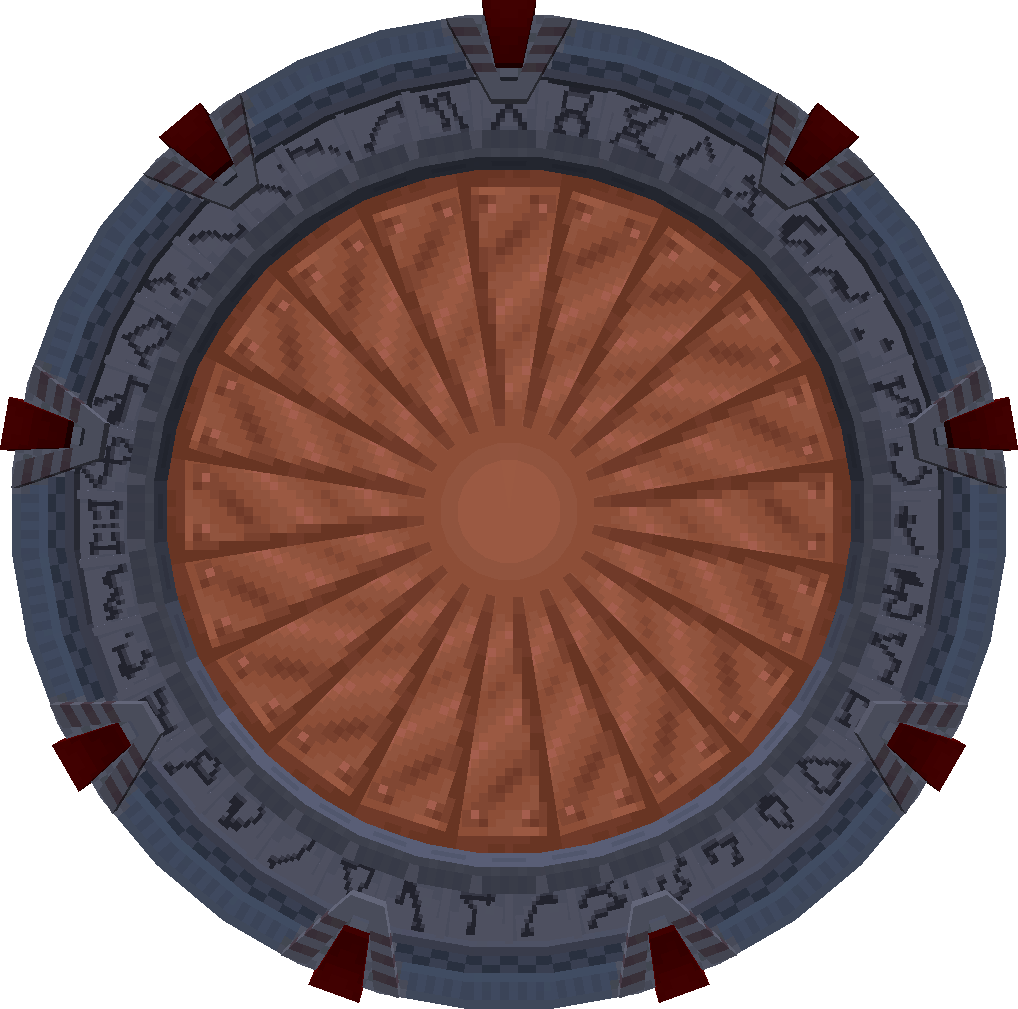
Iron iris
iron_iris
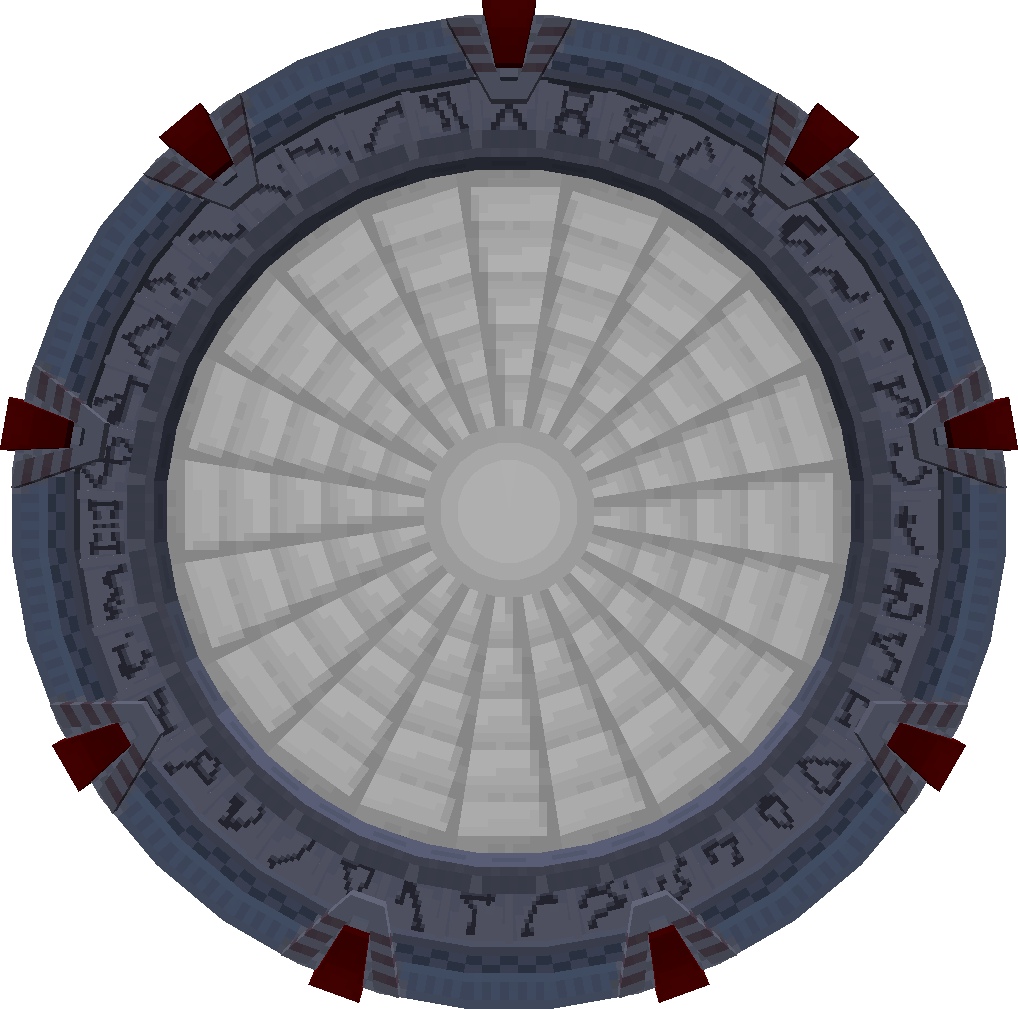
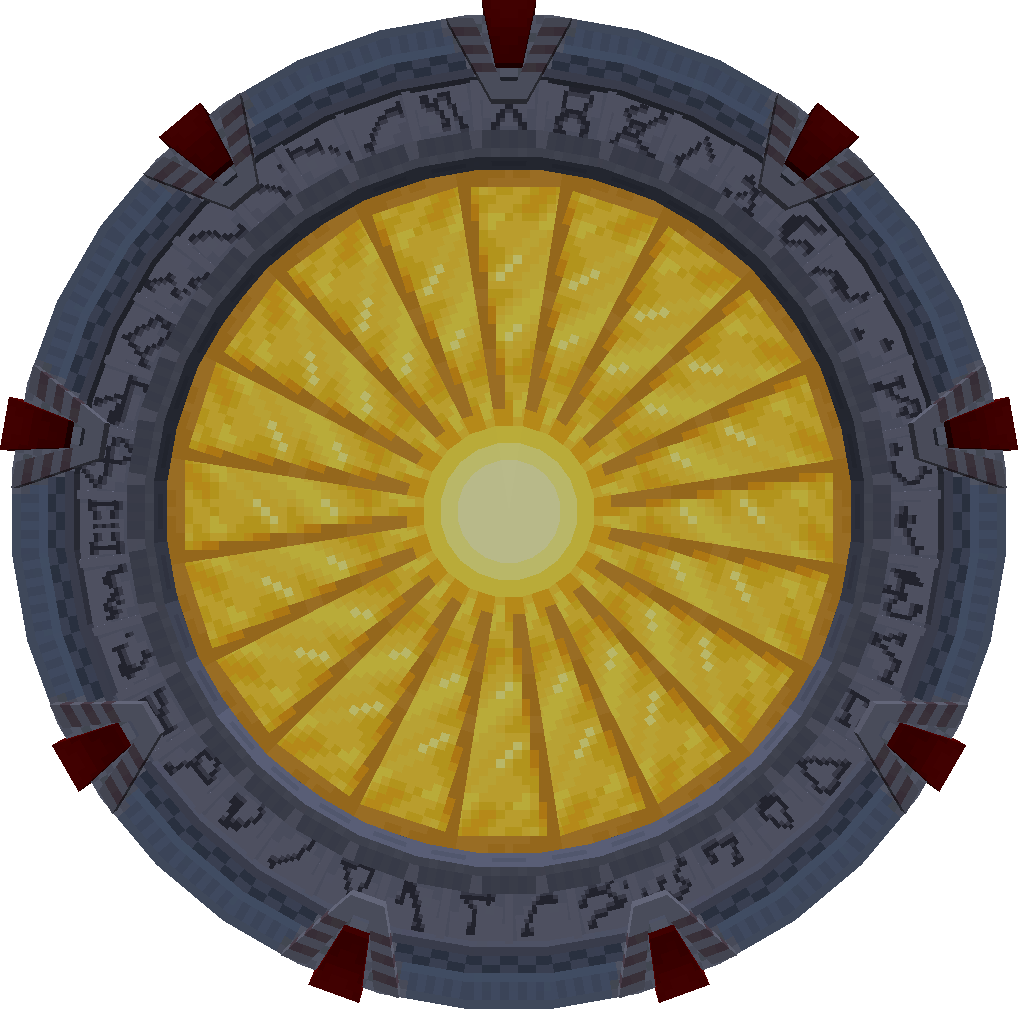
Golden iris
golden_iris
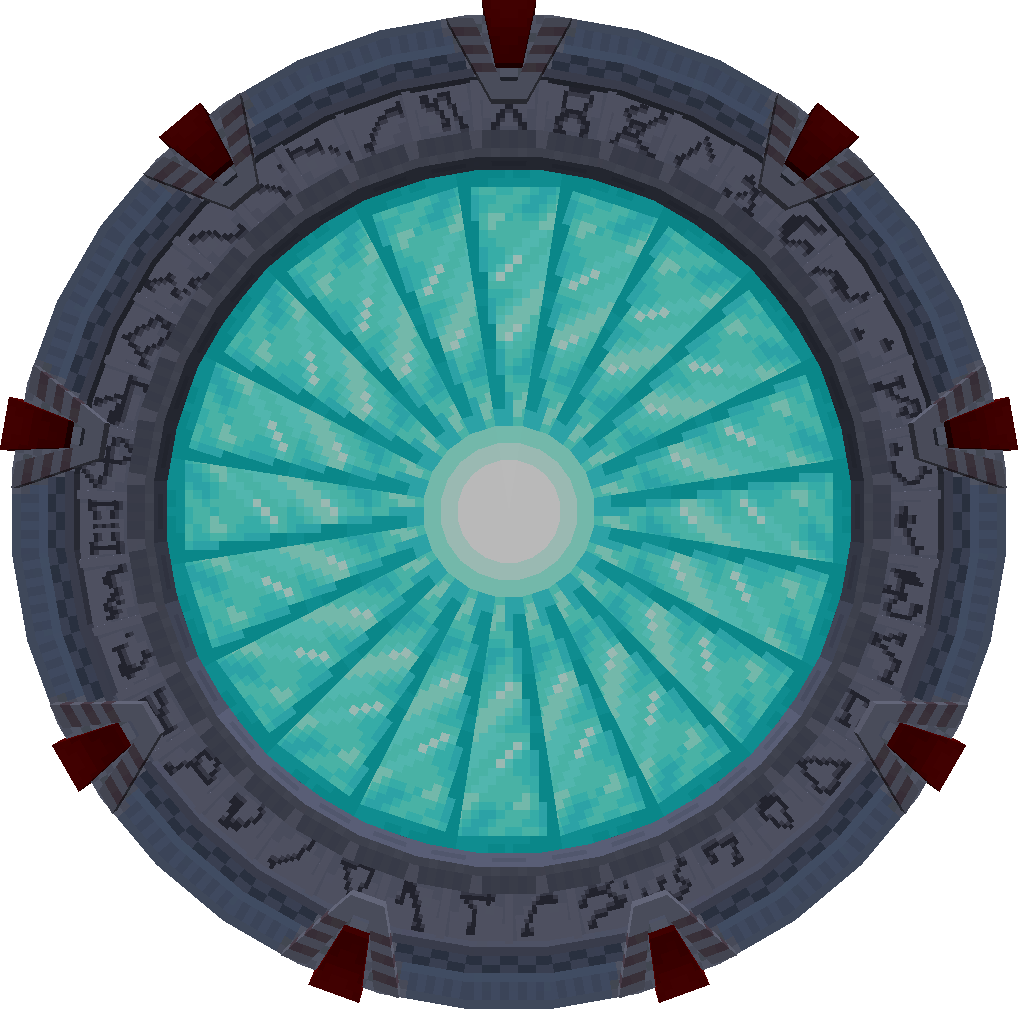
Diamond iris
diamond_iris
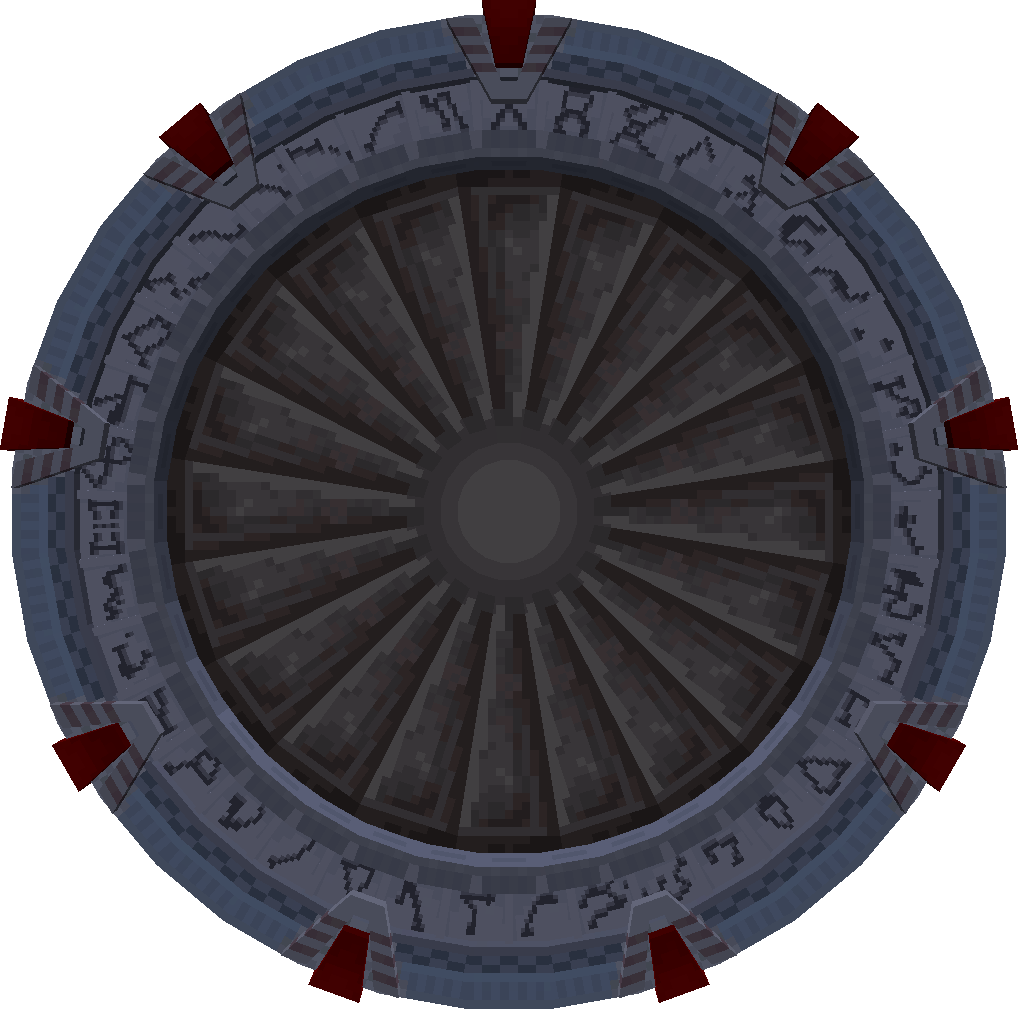
Netherite iris
netherite_iris
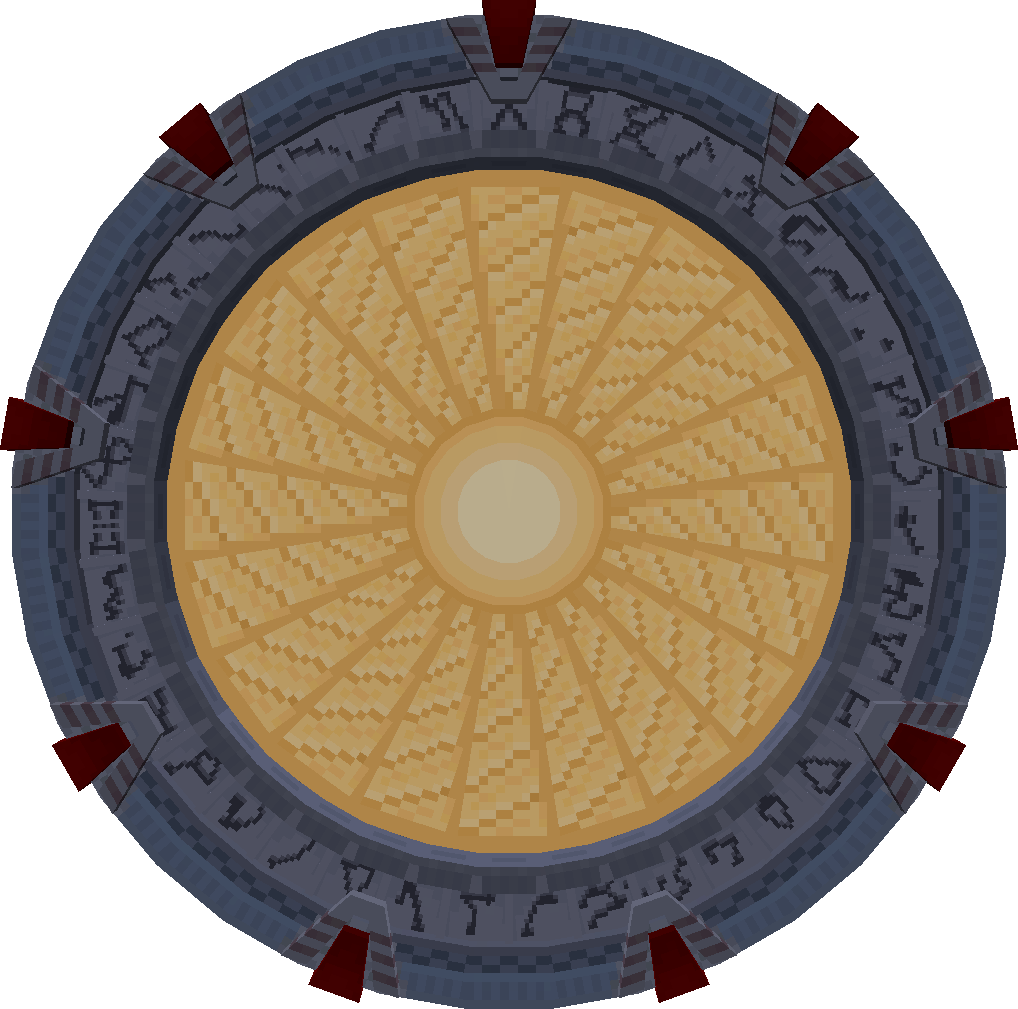
Bronze iris
bronze_iris
Crafting
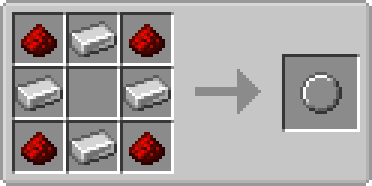
You will need a Stargate shielding ring first to craft an iris, which you can craft with four iron ingots and four redstone dusts.
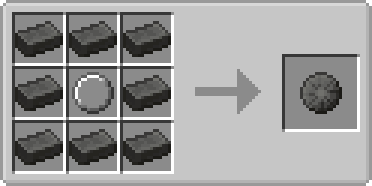
Then, you can use the ring in the middle of the crafting table and surround it with a material for the iris type.
Setting up
Once you have an iris, you can install it into any Stargate with right-click (except for Tollan Stargate, which is too thin for an iris installation).
Only a single iris can be installed on the gate at the time. To remove the iris from the gate or replace it with another one, you must close and break it.
Controlling
Ensure all your stuff controlling the gate (the redstone circuit and related) is in the same chunk as the gate itself. Otherwise, when an incoming connection to the gate loads the remote chunk, anything outside the gate’s chunk will not be loaded, so that it won’t work.
Also, do not use pistons in the redstone circuits. Pistons and similar mechanics will not work when the gate loads the chunk.
Manual control
The iris can be controlled with a Stargate interface with redstone or computers. Additionally, you can use a Garage Door Opener (GDO) to open the iris remotely.
If you don’t know redstone well, pay attention to each block and its direction, comparators and repeaters don’t work both ways.
First, you need to set up the basic interface in the shielding mode (not that other interfaces can’t be used yet).
Stargate Network / Stargate Interface / Shielding mode
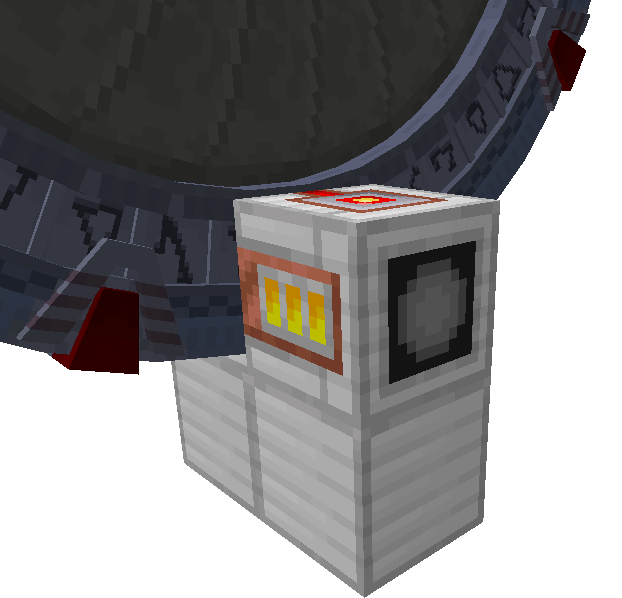
Basic setup with a lever control
For controlling the iris with a single lever, we need to constantly power the interface with a signal of strength 7 or lower.
That is required to close the iris whenever the lever is turned off. Then simply powering the interface with a signal of strength 8 or more will open the iris.
There are, of course, plenty of ways how to do it, here are two examples.
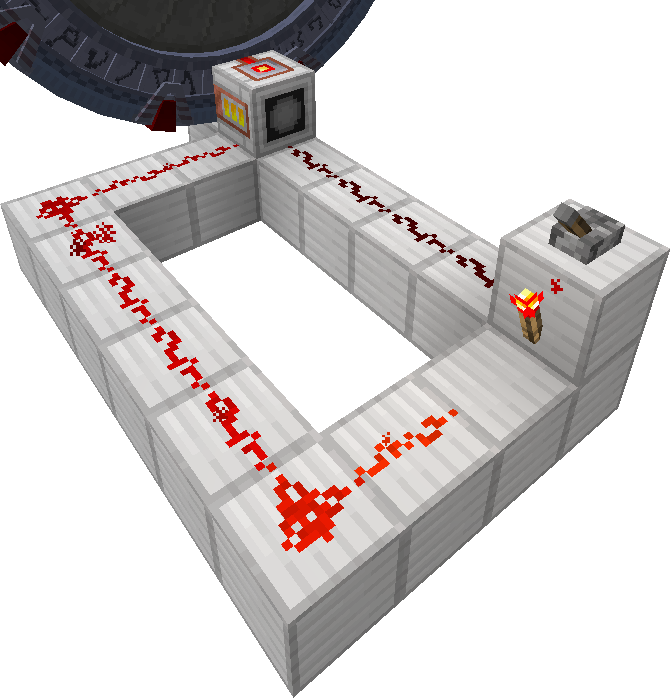
The simple way using a lever and redstone torch. The torch emits a signal of strength 15, the left path is 9 blocks long. Redstone loses a level for each block, leaving the interface with signal strength 7 (which is the largest strength level that closes the iris). The direct way from lever has a length of 4 blocks, providing signal strength 12 when lever is switched on (any signal above 7 will work).
Note that the length of redstone is critical here.
More minimalistic way
The redstone torch emits signal strength 15, which powers the comparator from the back. The right path loses two levels, providing the comparator with signal strength 13 from the side. The comparator is set to the subtraction mode, outputting signal strength 2 (15 - 13 = 2). The lever powers the repeater, which provides signal strength 15 to the interface. Fifteen from the repeater is more than two from the comparator. So, the iris is opened once the lever is switched on (due to the higher signal strength from the repeater). And closed when the lever is switched off (due to the only signal from the comparator).
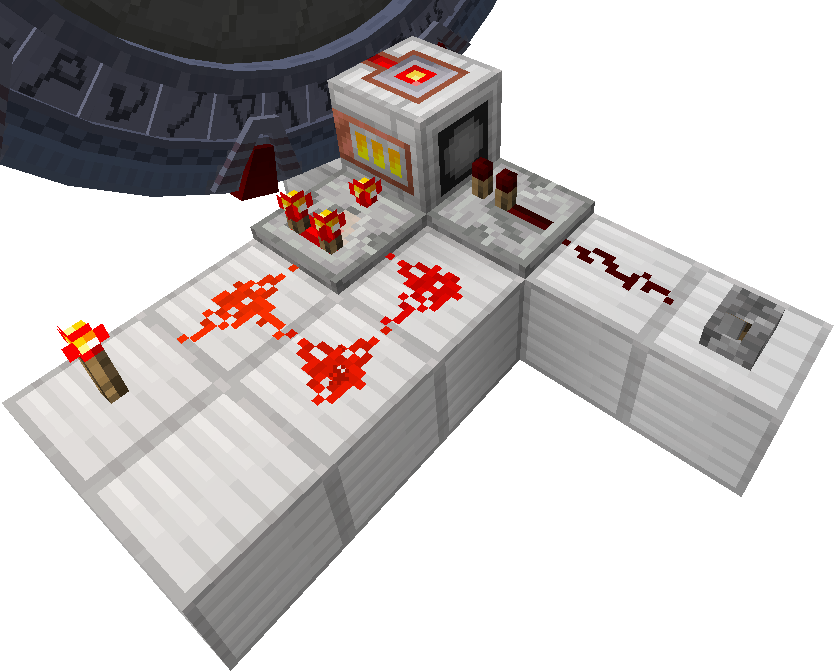
Automatic iris closing
What if you wanted the iris to automatically open for outgoing connections, so you can use the gate, and closed for incoming connections reflecting any uninvited visitors, unless opened with a lever?
It is indeed possible with a very simple setup.
Using an interface in the wormhole mode will provide appropriate signal strength for the interface in the iris mode to automatically open/close the iris based on the connection direction.
During an incoming connection, the iris can be easily opened with a redstone signal of strength 8 or higher.
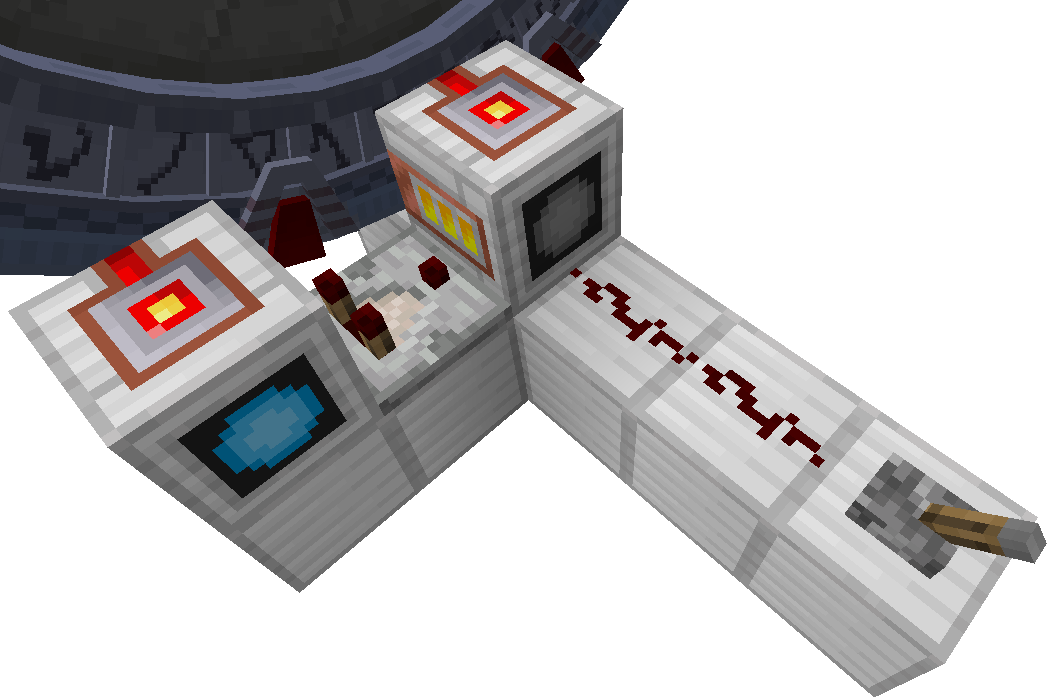
You can also instruct the iris to open automatically when there is no connection. With another comparator, you can read from the interface in the wormhole mode whether there is an active connection. Negating this signal with a torch will power the interface in the iris mode, opening the iris when there is no connection. When there is any connection, the second comparator will emit some signal to the torch, powering it off and leaving the first comparator to provide an appropriate signal to the iris interface.
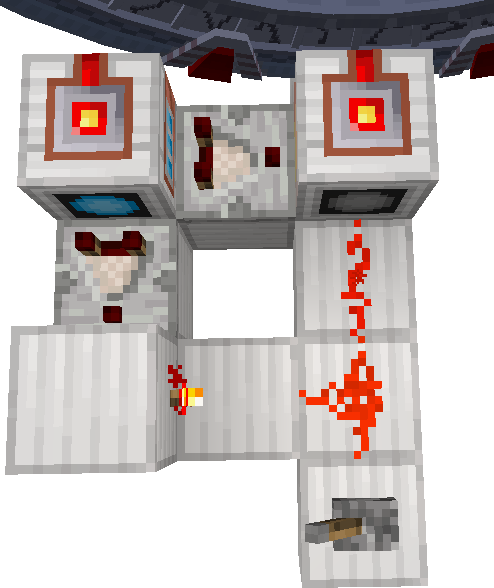
Remote iris control
So you have secured the gate with an auto-closing iris for incoming connection, but how you can open the iris when you are on the other side of the connection?
Garage Door Opener (GDO) is a hand-held device that allows to send a signal through the Stargate connection to the other side. For example, automatically opening the iris.
Ensure that the whole circuit is in the same chunk as the gate itself.
Another example redstone circuits
A first circuit for iris control with GDO created by Wold 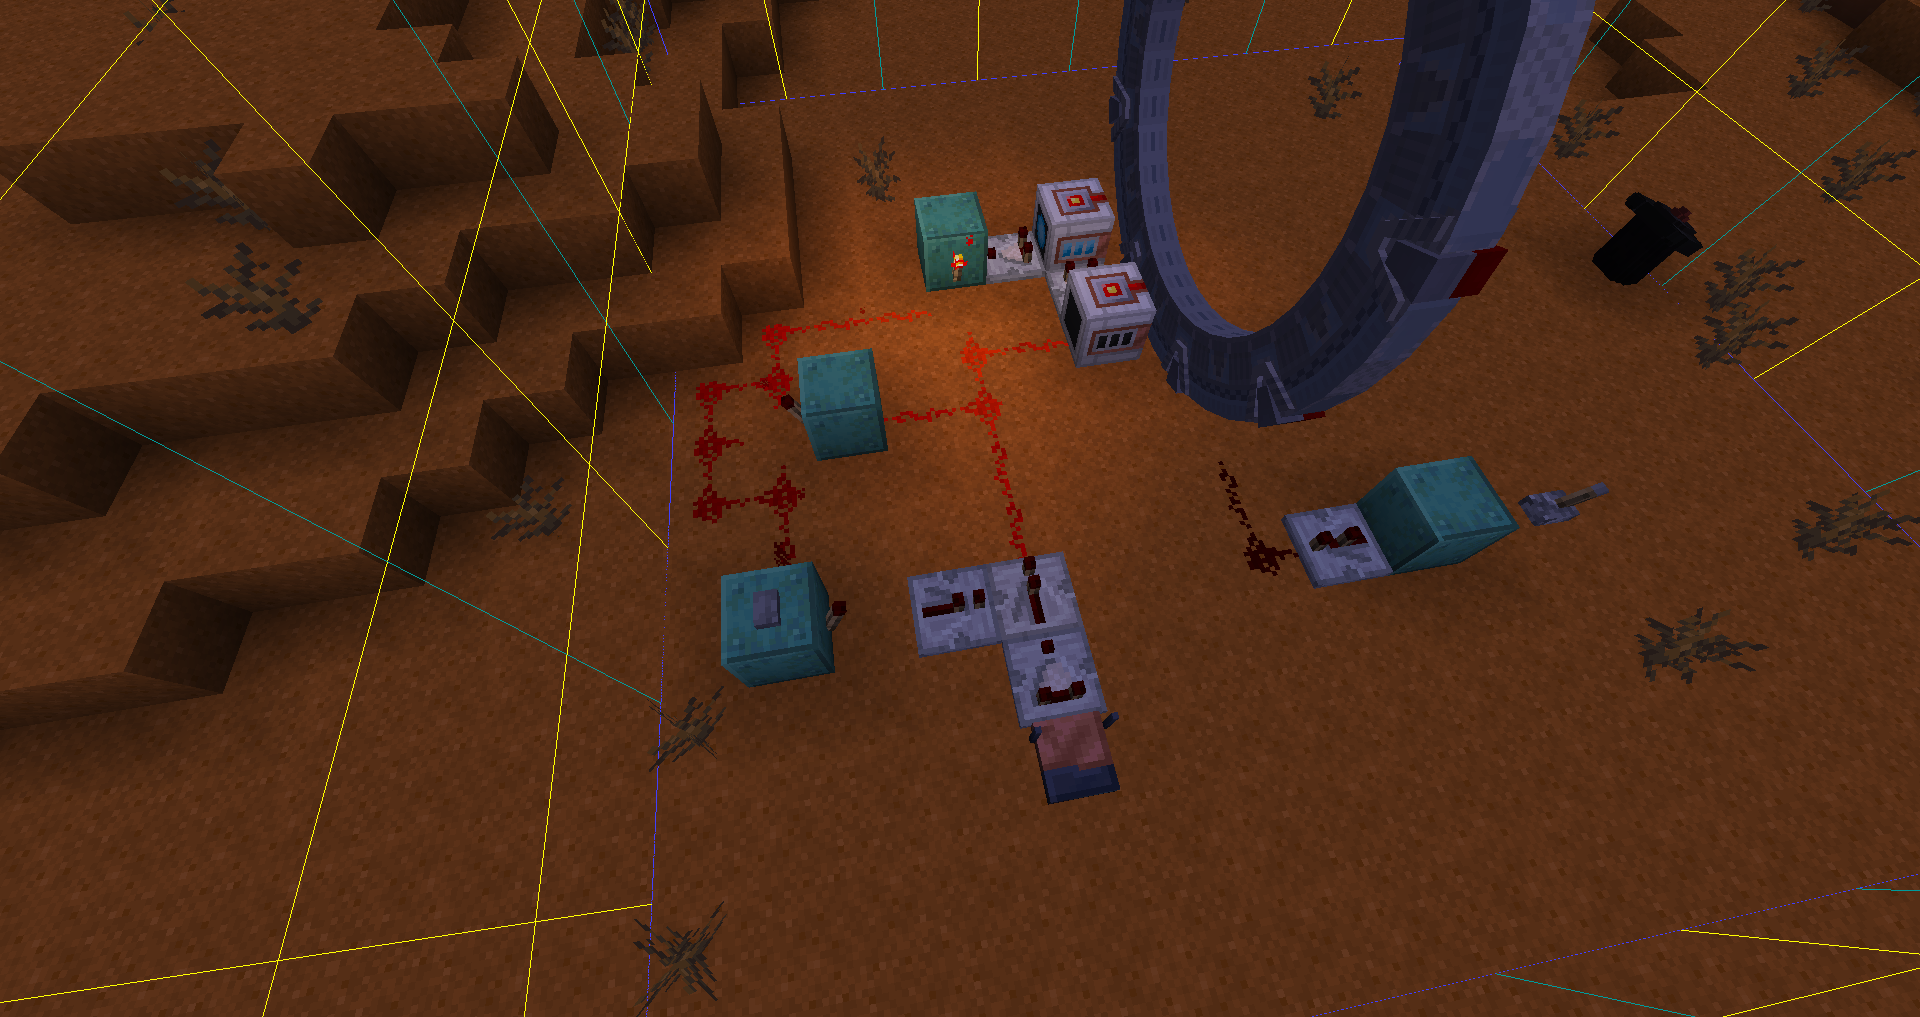 More compact version by JimmyBlether
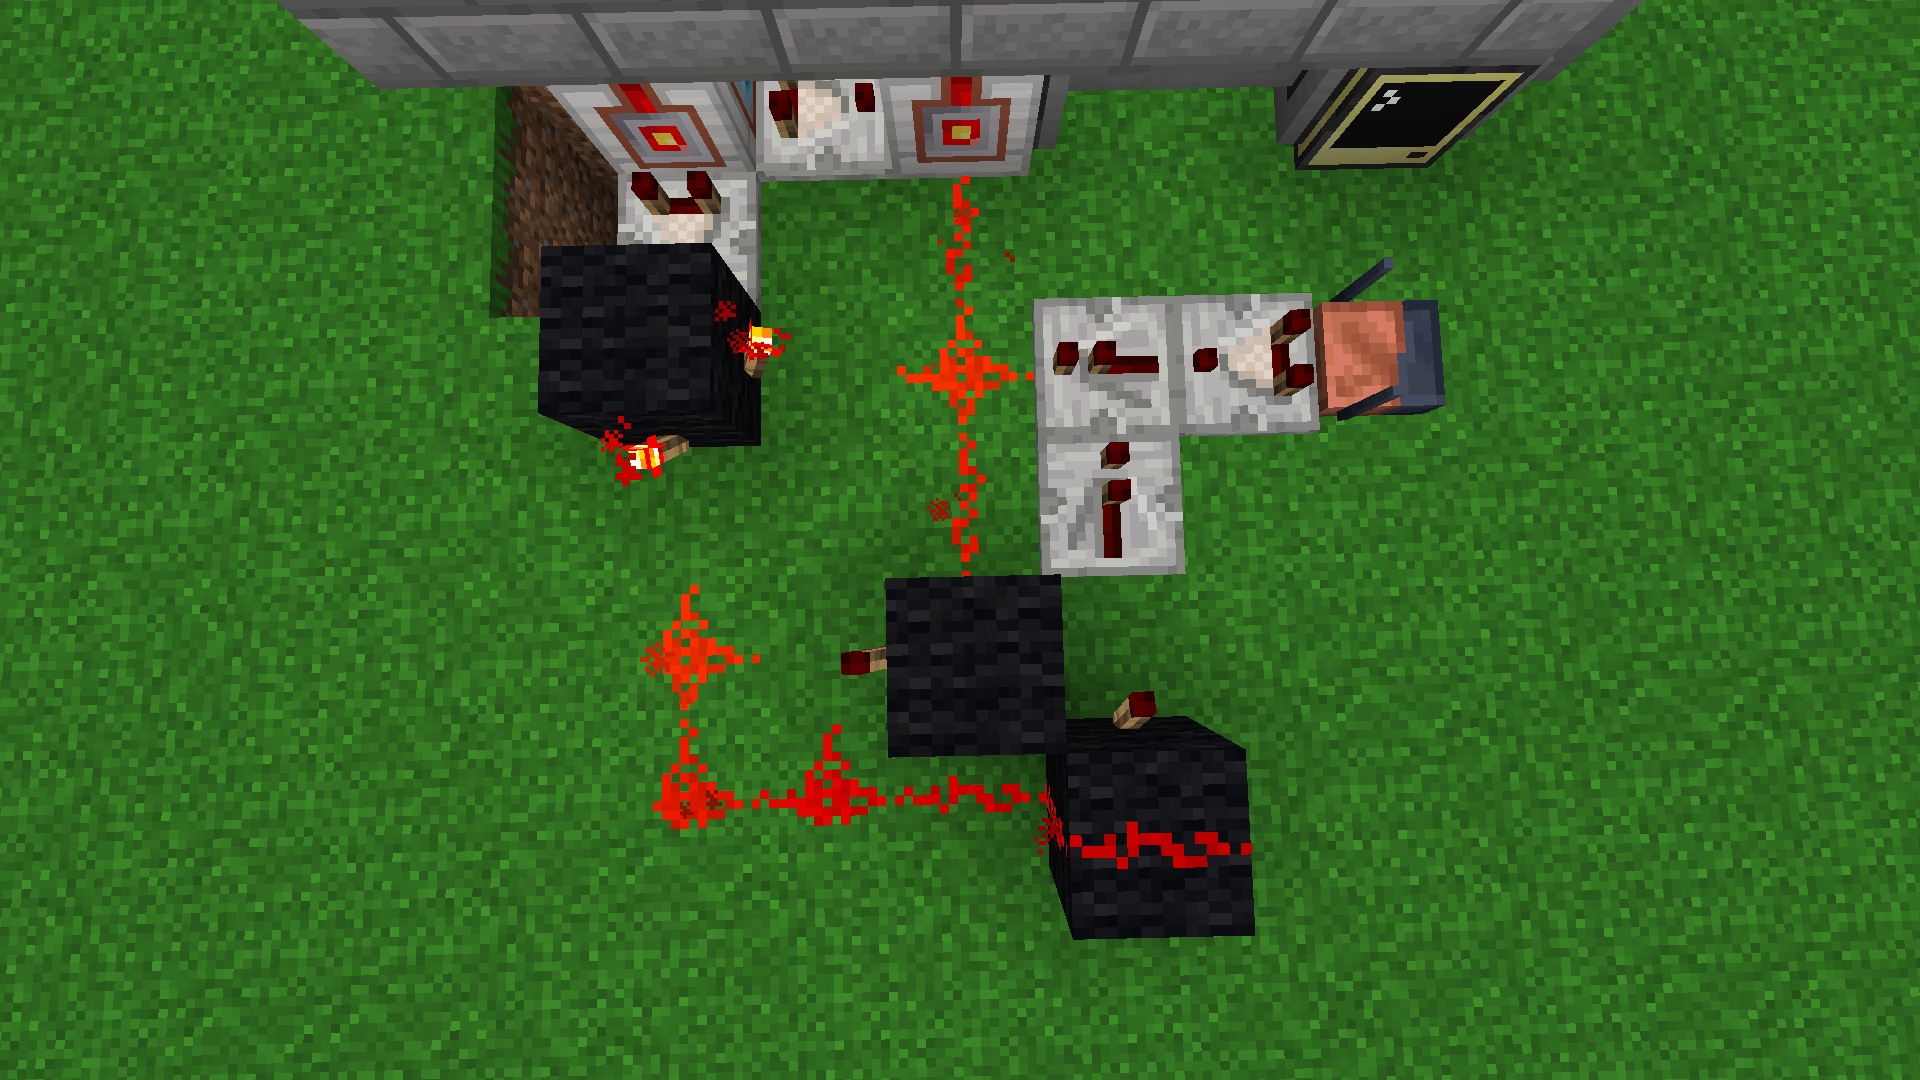
The following circuit will be discussed and explained.
The circuit automatically closes iris on incoming connection. Opens the iris on receiving a correct code by the transceiver. Automatically opens the iris on outgoing connection. Additionally, iris can be automatically opened when the gate is idle (there is no connection), more transceivers or iris control with a buttons or lever added.
All repeaters are set to delay 0 (default state), and all comparators all set to comparator mode (default state).
Used items:
- 12 blocks
- 2 stargate interfaces (any type)
- 3 redstone comparators
- 1 transceiver
- 4 redstone torches
- 6 redstone dusts
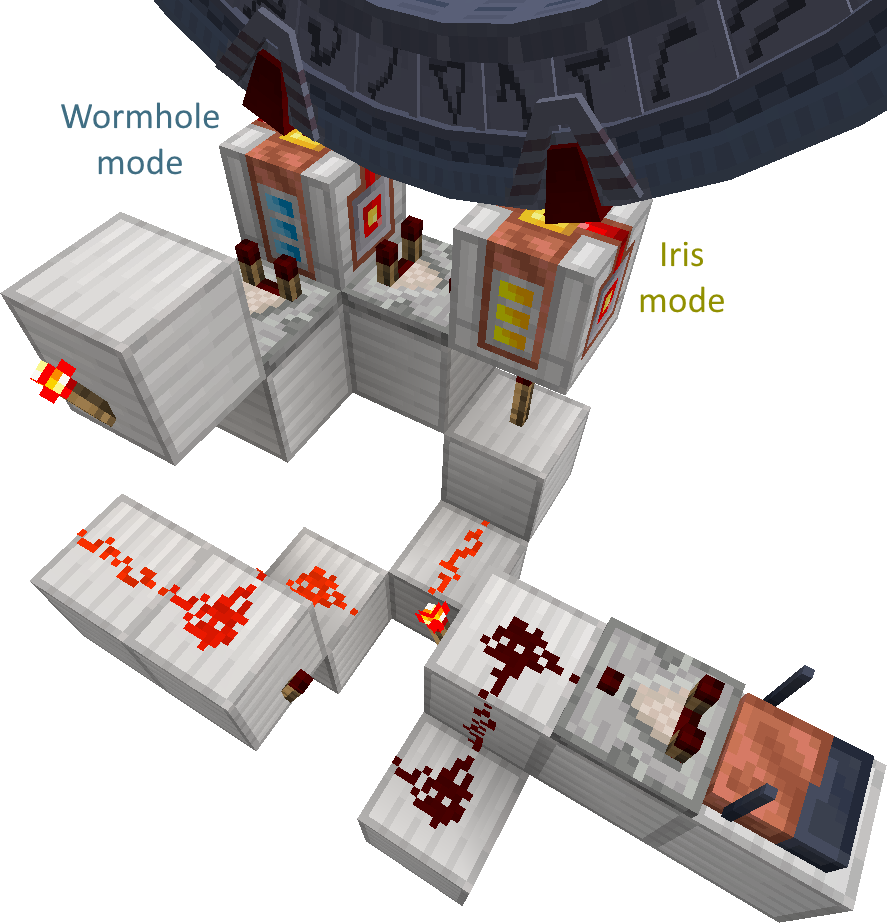
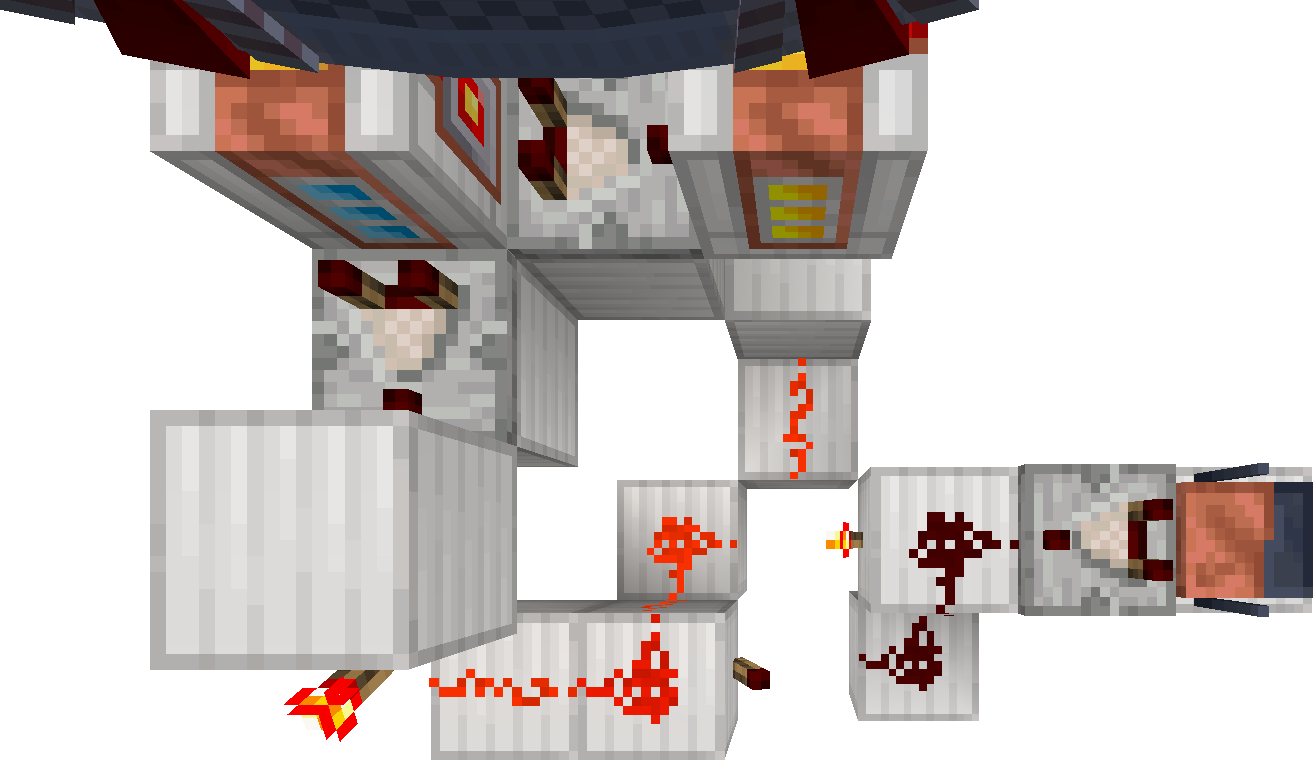
Adding two slabs (must be slabs) and a torch instructs the iris to automatically open when the gate is idle. Additionally, buttons can be added. The top/left one closes and the bottom/right one opens the iris.
Circuit breakdown
So, how the circuit with GDO works.
As explained in the automatic iris closing section, the interface on the left in the wormhole mode will provide via comparator a signal of strength
- 0 – When there is no active connection, resulting in no action from the interface in the iris mode on the right.
- 7 – When there is an incoming connection, resulting in closing the iris by the interface on the right.
- 15 – When there is an outgoing connection, resulting in opening the iris by the interface on the right.
Next, we need to add the control of the iris with the transceiver.
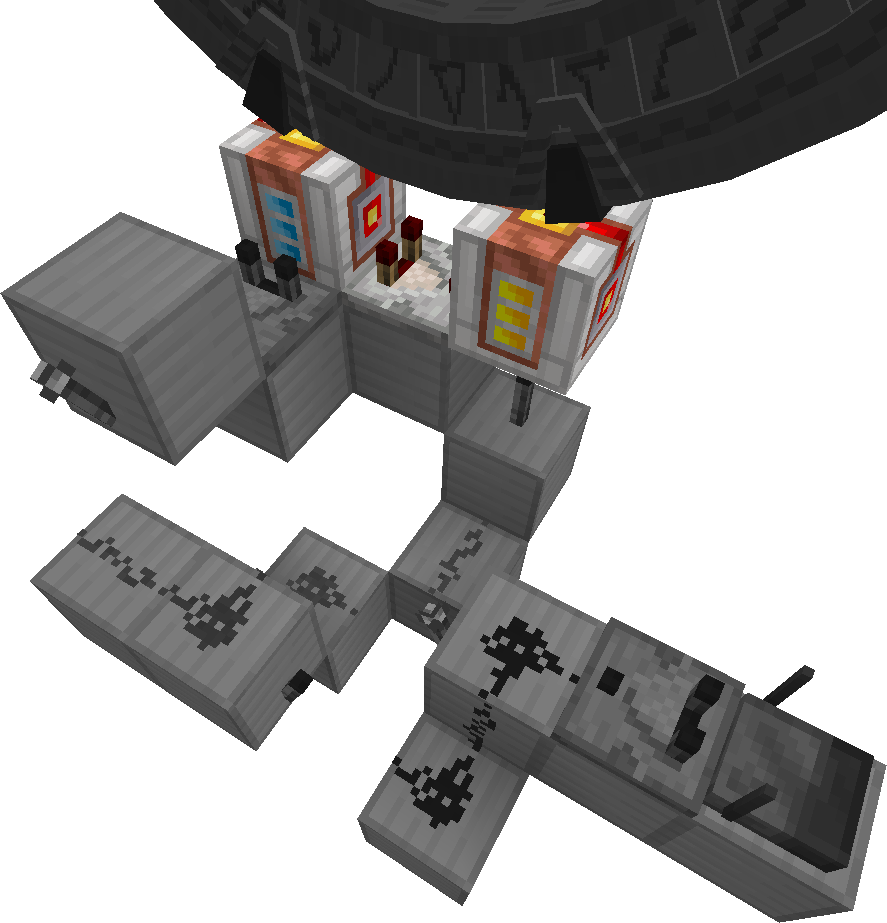
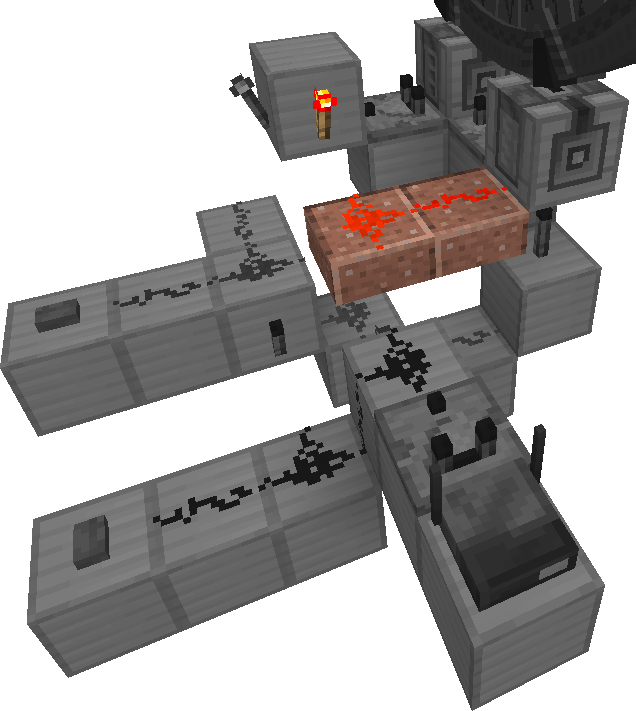
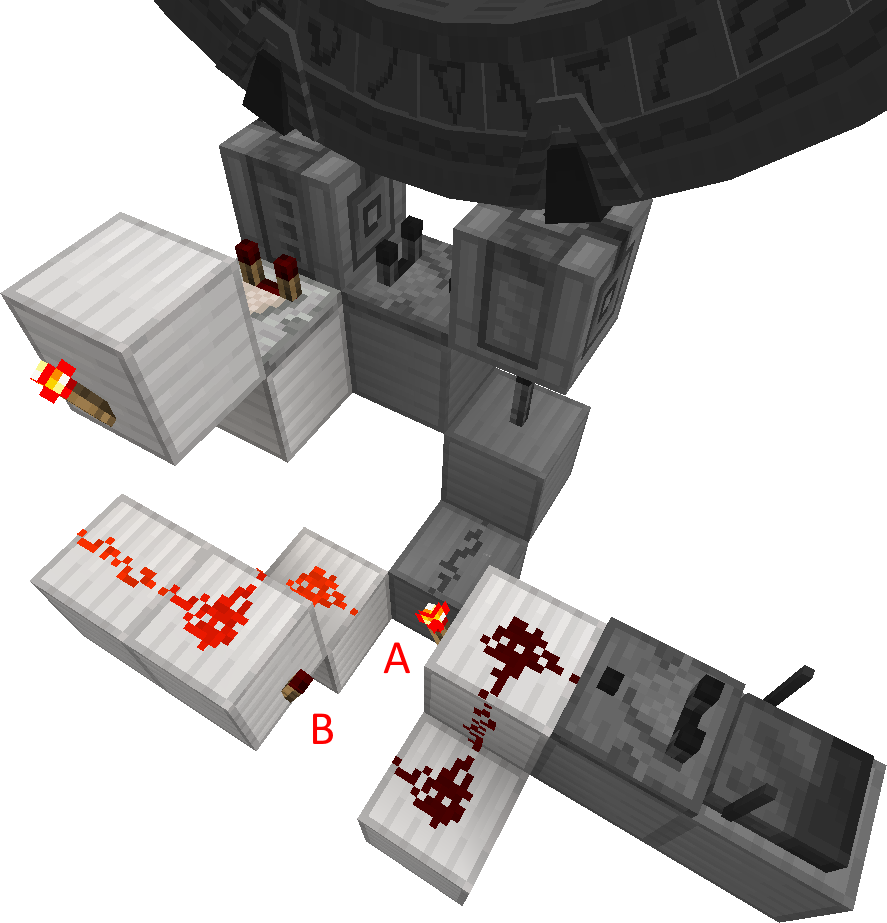
As a core of our circuit, we use RS NOR Latch. This part of the circuit holds the state of the iris. Only one of the redstone torches (marked in the image with a letter A or B) can be active at the time. A single redstone signal pulse to a redstone dust on a side of the latch will switch it to the desired state. The latch will hold the state until its switched again.
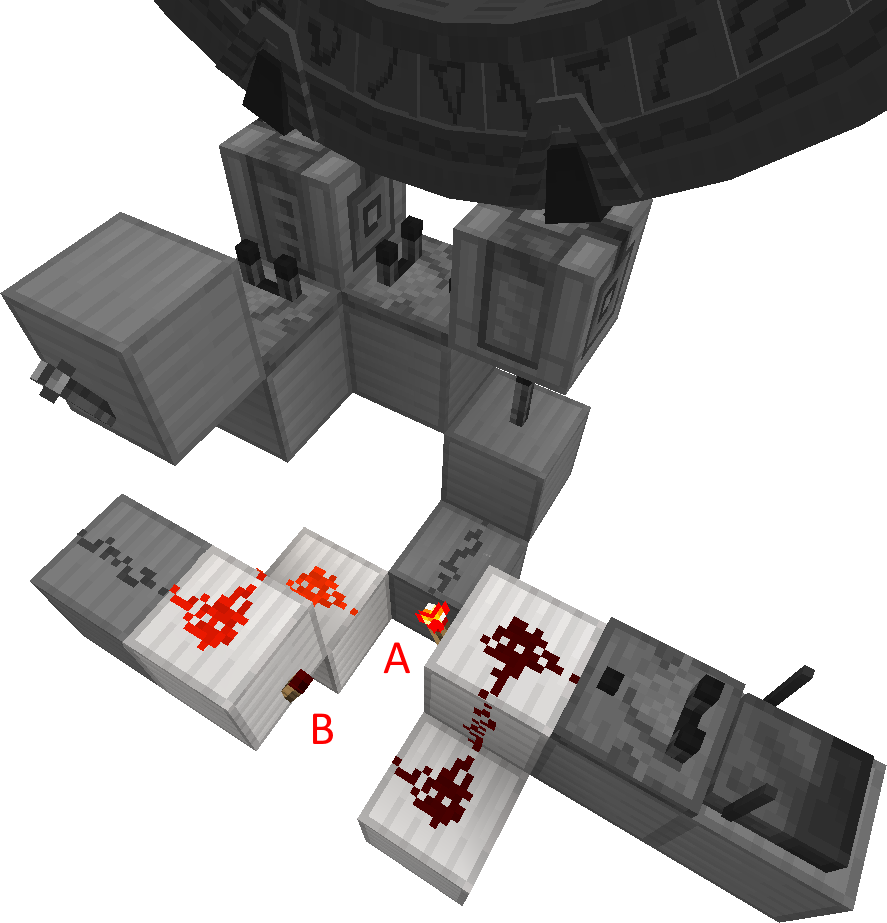
For the output of the RS NOR Latch a torch marked with letter A is used. However, the torch under the interface in the iris mode negates the signal. So in fact, the state of the torch B is the same as the state of the torch under the interface. This indicates whether the iris should open. When the torch A is inactive, the torch under the interface will light up. That will power the interface with signal of strength 15 instructing the iris to open.
So, when we want the iris to open, we need to bring a redstone pulse to the redstone behind the torch A.
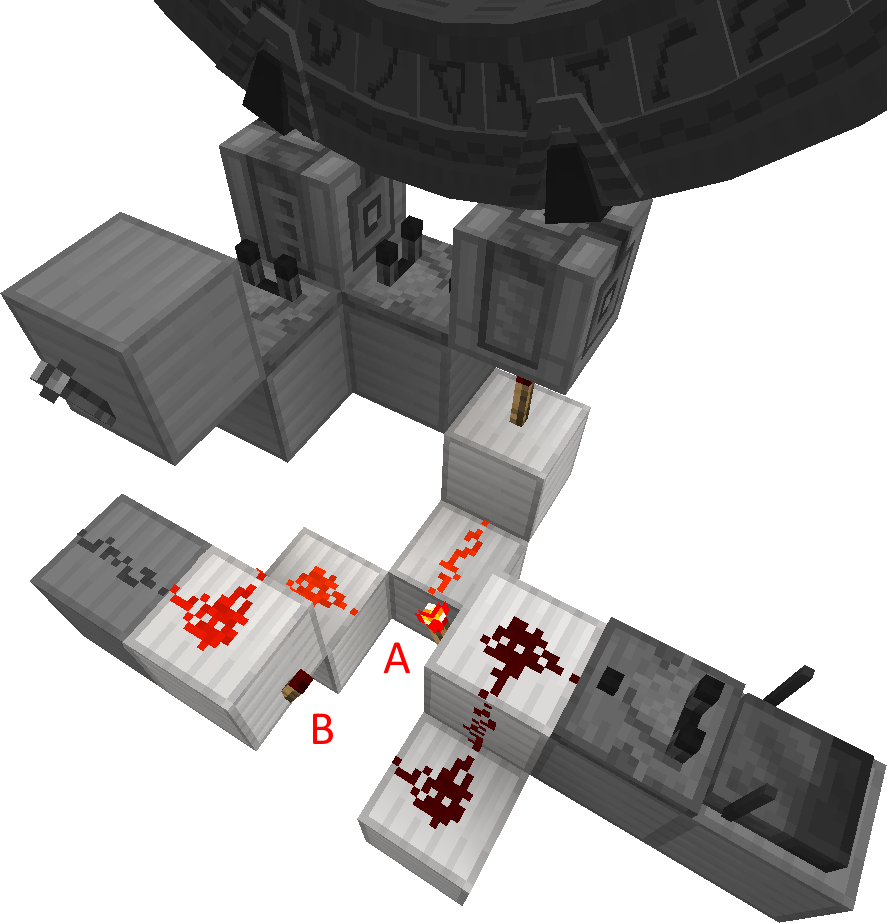
Thats easy, isn’t it?
All we need to do is add the transceiver powering the redstone dust behind the torch A. Now whethever the transceiver receives a valid code, it will emit a single pulse via the comparator. A single pulse is enough to switch the RS NOR Latch to the state when the torch A is inactive and torch B is active. This will activate the torch under the interface and instruct the iris to open.
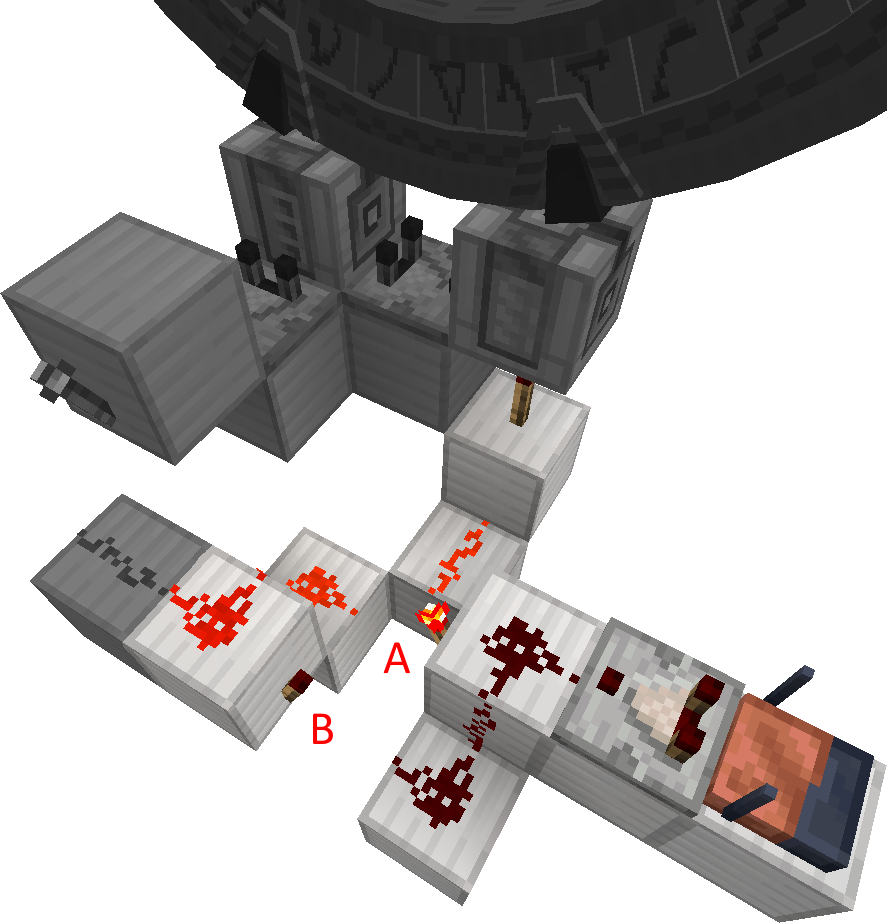
Iris opened
Leaving the circuit like that will never switch the latch back to active torch A and the iris will never close for the next incoming connection. We need to reset the latch state when the connection is over.
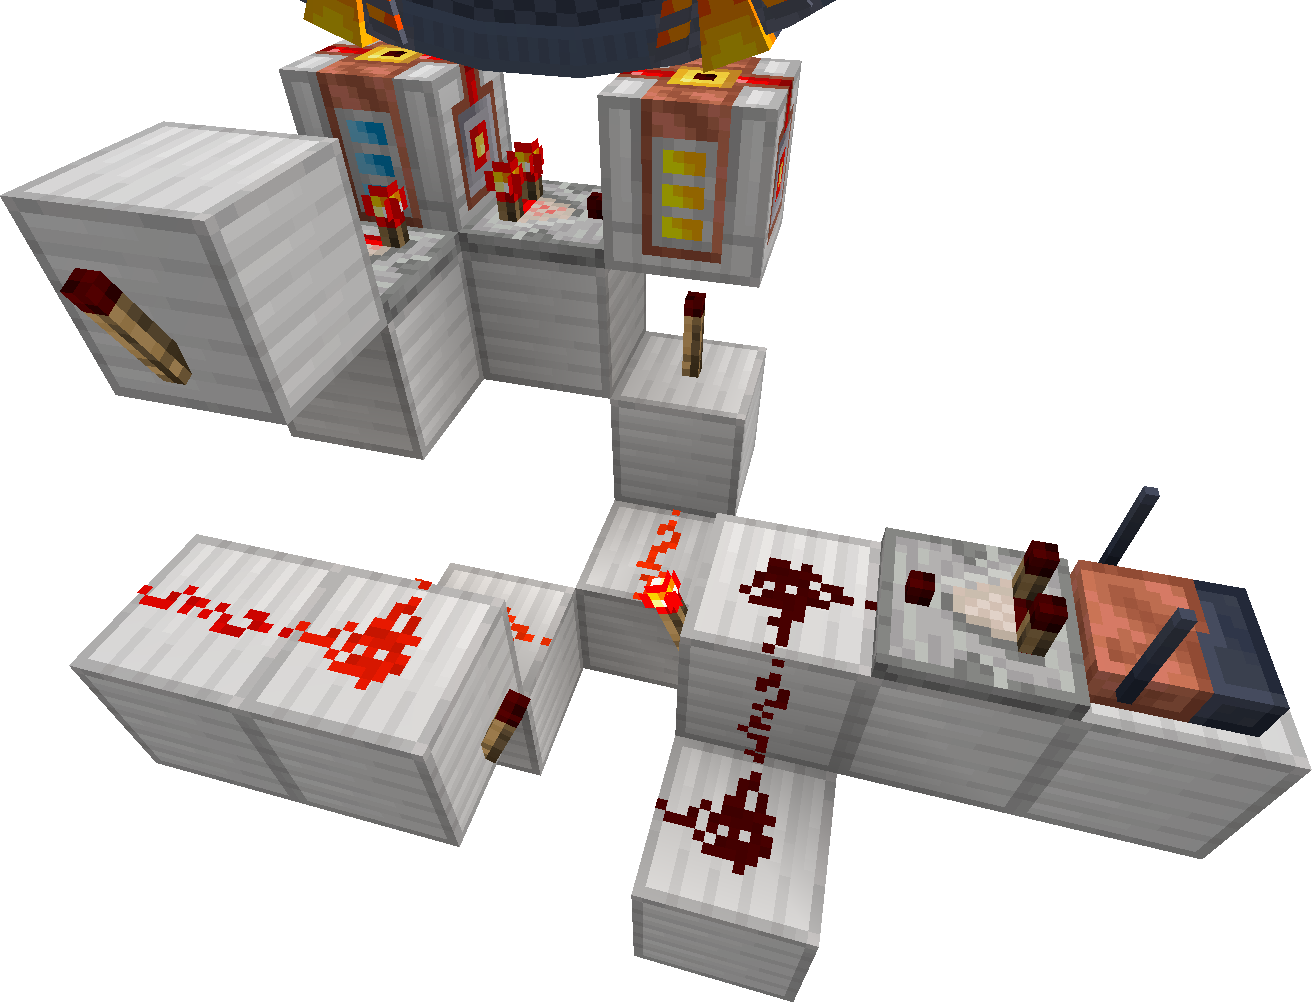
With a new comparator, you can read from the interface in the wormhole mode whether there is an active connection. This signal can be negated with a redstone torch which can power the latch behind the torch B. So whenever the gate is idle (there is no active connection), the comparator won’t output any signal, leaving the torch active. The torch will power the latch, switching it to the default state allowing the iris to close (the torch under the iris interface is off). When there is any active connection, the comparator reading the wormhole interface will light up which will turn off the torch allowing the RS NOR Latch to be switched.
As mentioned before, the iris can be also instructed to automatically open when the gate is idle. We already have a place, which can emit a signal when the gate is idle. Hooking the added torch directly to the interface in the iris mode will power the interface with signal strength 14 opening the iris whenever the gate is not active.

Summary
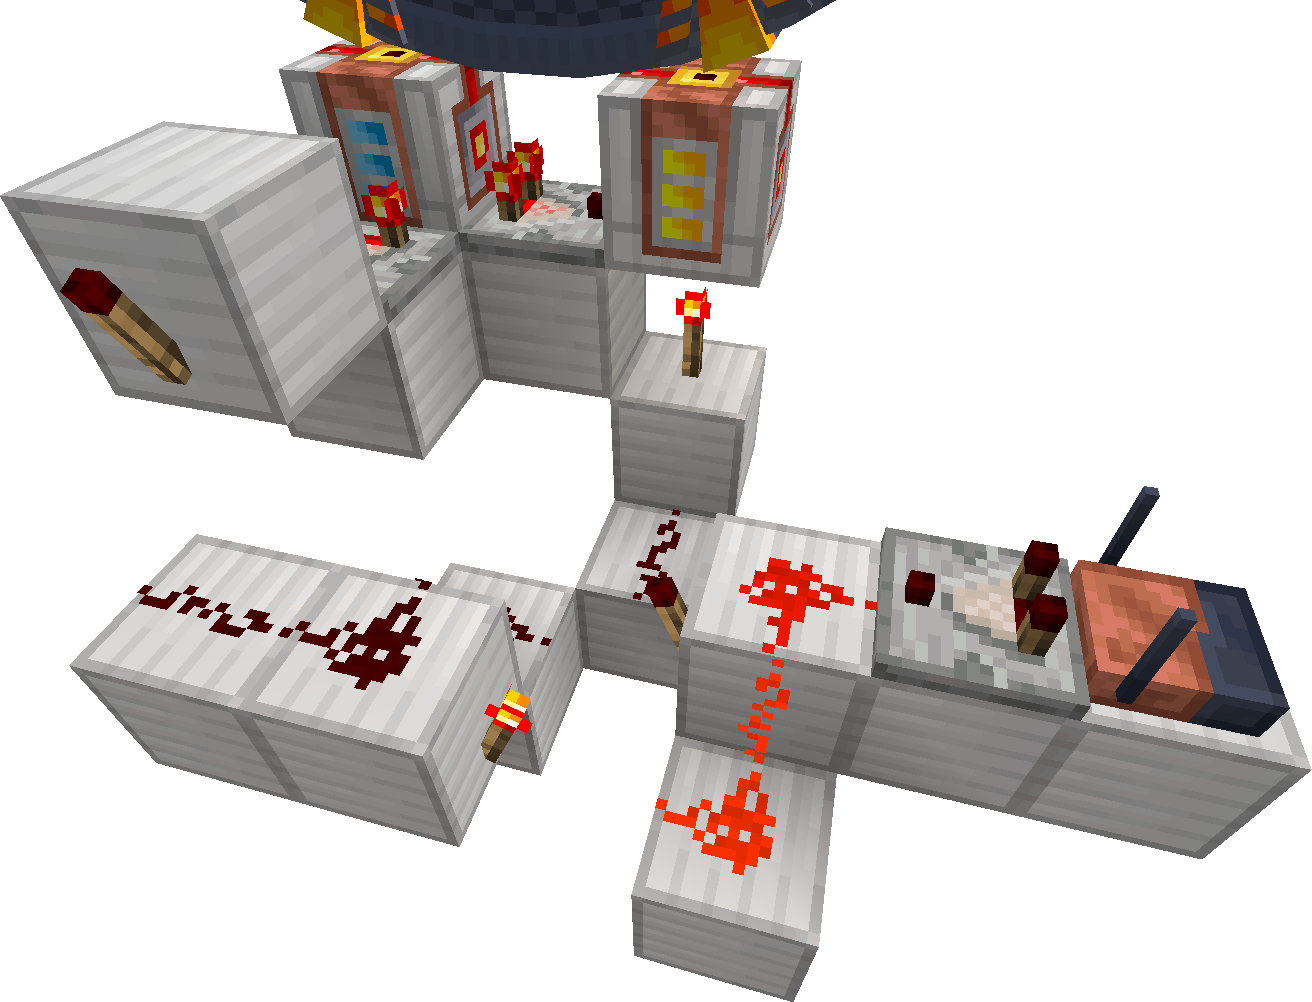
When the gate is active, the left side of the latch should be active. The torch below the interface in the iris mode should be inactive, leaving the comparator between interfaces to instruct the iris based on the connection type (open for outgoing, close for incoming). The second comparator reading from the interface in the wormhole mode disables the torch resetting the latch, allowing it to be switched to the other state by the transceiver (to open the iris when requested).
When the transceiver receives the correct code, it will send a pulse to the latch, switching it to the other state. That will activate the torch below the interface instructing the iris to open.
Expanding the circuit
Here is an example of adding two levers which can act as a manual override of the iris. The lever on the left closes the iris when activated. The lever on the right opens the iris when activated (also overriding the lever on the left).
The right lever is connected directly to the redstone on the original granite slabs, adding one slab. There are two solid blocks added next to the granite slabs to block neighboring redstone dust.
The left lever powers the block with torches to reset the RS NOR Latch, the block below the torch below the interface in the iris mode. The comparator between the interfaces is powered from the side with a repeater, and the interface in the iris mode is powered directly with dust (to keep the signal level low). The comparator between the interfaces is set to subtracting mode. The lever will also override the GDO signal. In case you do not want the lever to override the GDO signal, simply remove the repeater powering the torch under the interface in the iris mode.
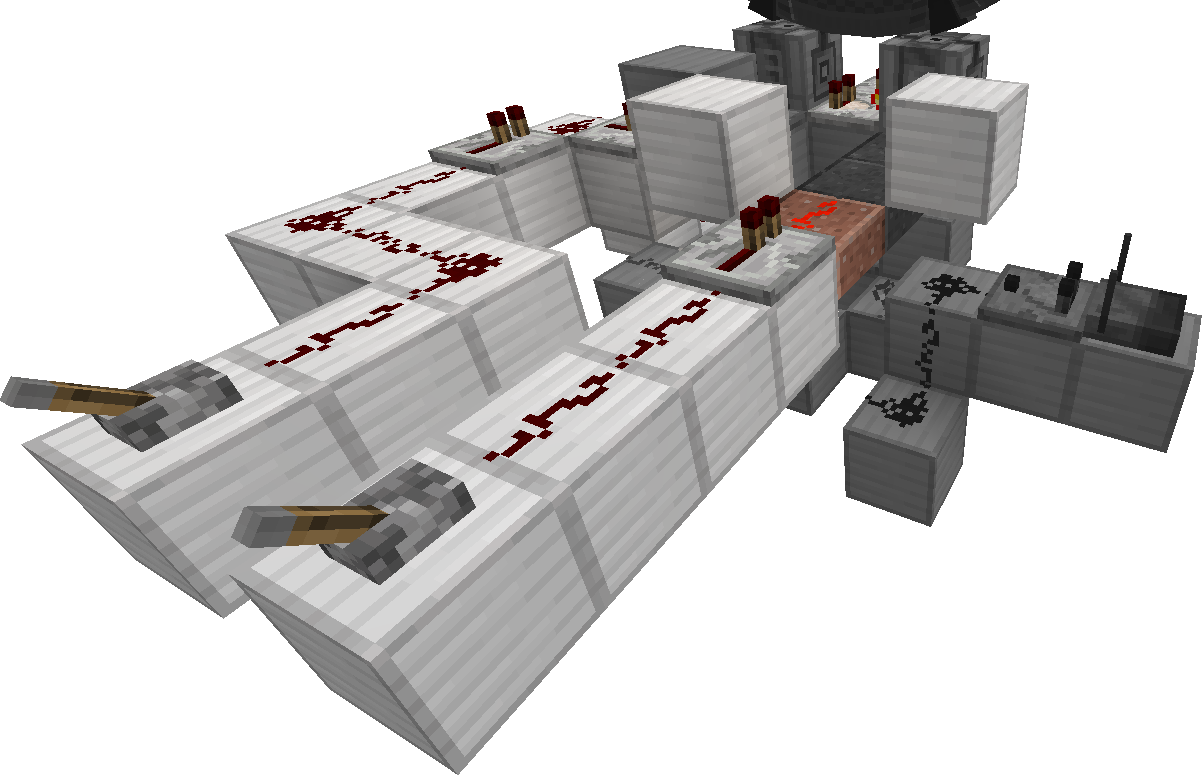
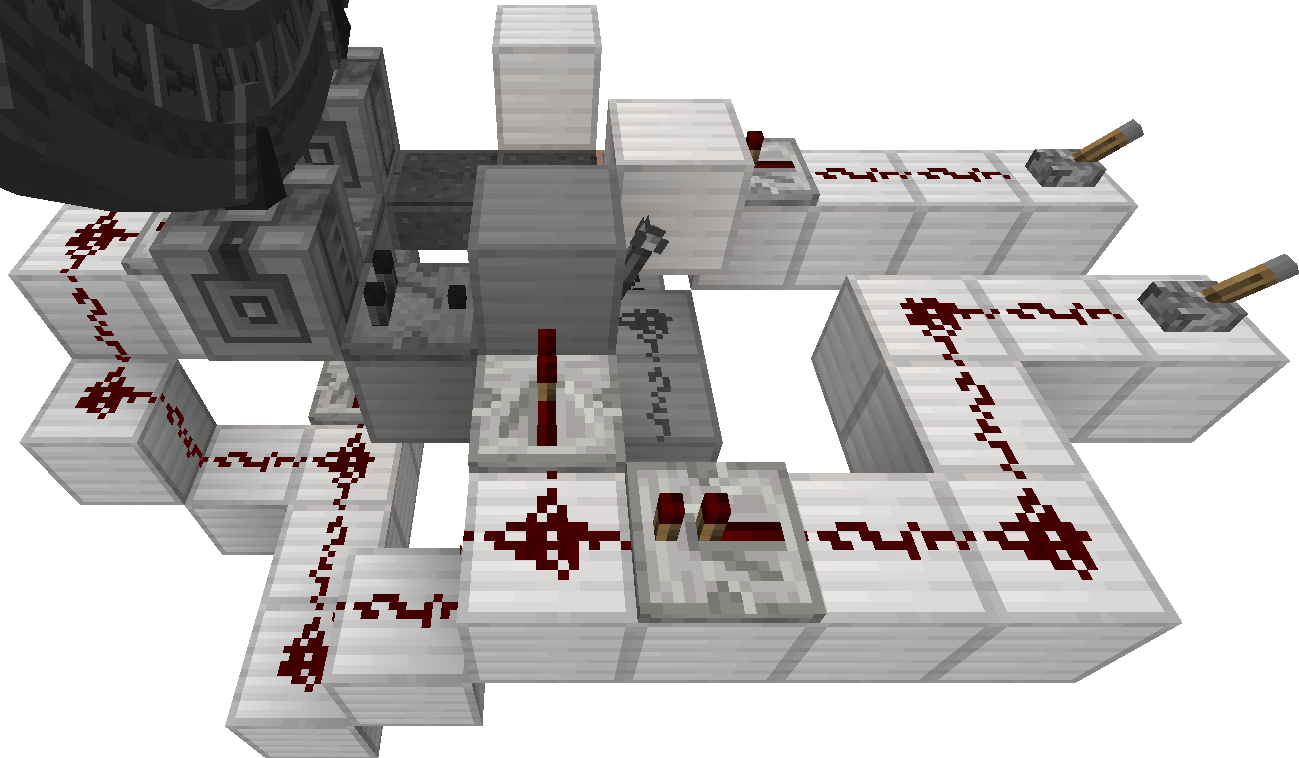
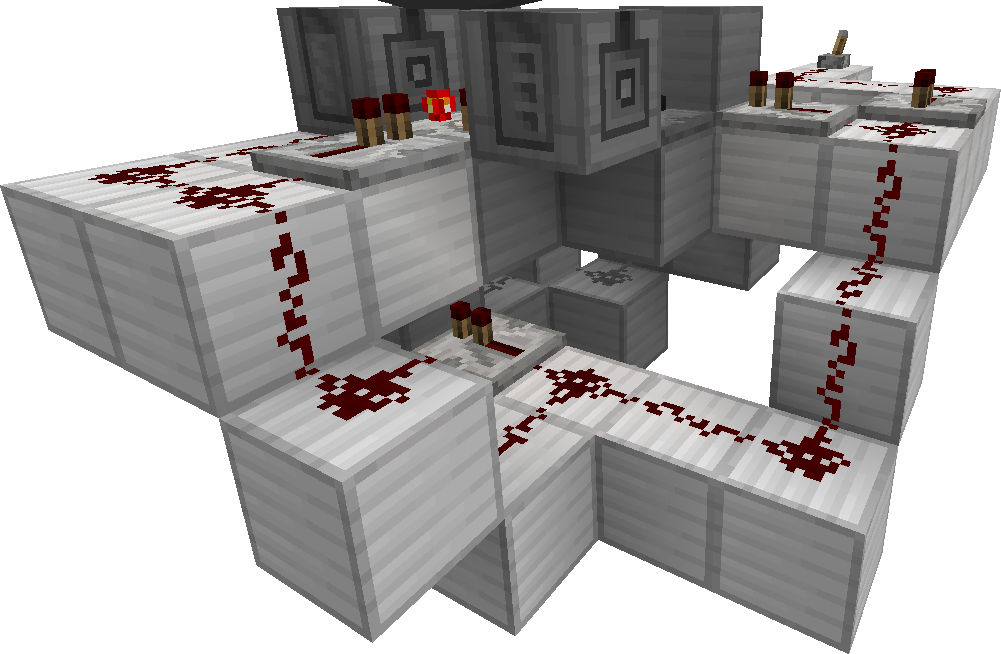
The finished circuit is available as a structure file created on 1.20.1 Stargate Journey 0.6.31.
You can place this file to
installation_folder/saves/your_save/generated/minecraft/structures/stargate_iris_gdo_manual_override.nbt
replacing the installation_folder with the folder name where your game is installed and your_save with the folder name of your world. Then you can place it in-game with command /place template minecraft:stargate_iris_gdo_manual_override. Make sure you have enough space around you that the structure won’t break your building. After placing, you will probably need to break the gate and place it again (remember to add the iris).